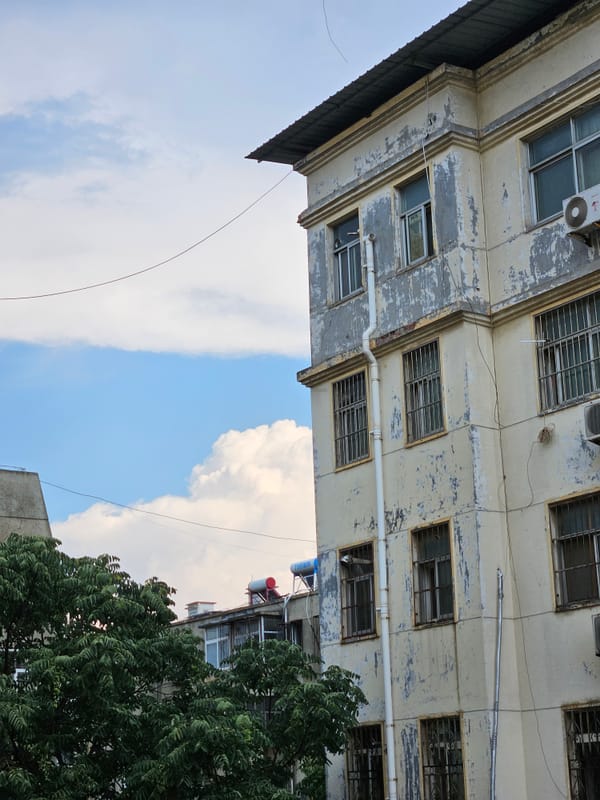
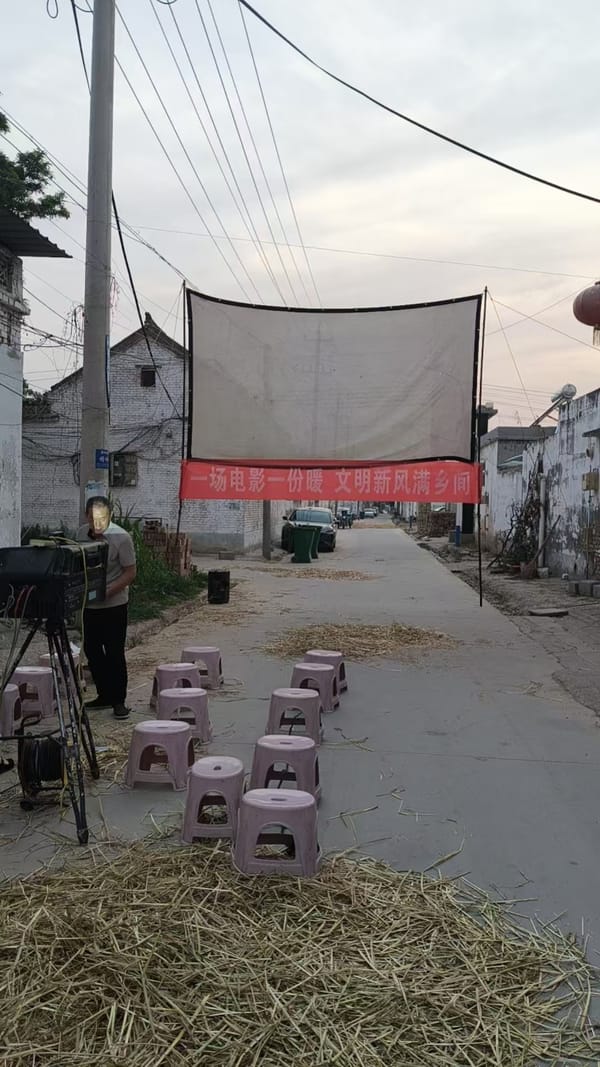
• How to Configure a Quectel EC20 LTE Module on Your SSC338Q Camera for Remote Access

    If you’re building a remote surveillance system, giving your camera cellular connectivity with a Quectel EC20 module is a powerful upgrade. Once configured in ECM (Ethernet Control Model) mode, the module acts like a virtual Ethernet card, pulling an IP address directly from your mobile carrier.

    This guide will walk you through the setup process on an SSC338Q-based camera. A key pro tip: we’ll configure a VPN like WireGuard or ZeroTier first. This crucial step will save you from being locked out of your camera once it switches to the cellular network, allowing for secure remote access without complex router configurations.


    Prerequisites & Planning

    1. Hardware: A camera with an SSC338Q chipset and a Quectel EC20 module (specifically variant 0x2c7c:0x0125).
    2. Initial Access: Physical access to the camera or a connection to its local network for the initial setup.
    3. VPN Setup: A configured VPN server (e.g., WireGuard or ZeroTier) installed on a cloud server, Raspberry Pi, or your local network. Ensure your camera can reach it and that you know how to connect your laptop to it.

    Why VPN First? Once the EC20 module is active, your camera’s network interface will change. It will be on your ISP’s cellular network, not your local Wi-Fi. Without a VPN already running on the camera, you will have no way to SSH into it to complete the setup. The VPN provides a secure “tunnel” back to your device.


    Step 1: Verify EC20 Module Detection

    Start by establishing an SSH connection to your camera over your local network.

    Run the lsusb command to list all connected USB devices. You should see a line identifying your Quectel module:

    bash

    ssh root@your-camera-local-ip
    lsusb

    Expected Output:
    Bus 001 Device 003: ID 2c7c:0125 Quectel Wireless Solutions Co., Ltd. EC20 LTE modem

    If you don’t see this device, stop here. Check your USB connections, cables, and power supply to the EC20 module.


    Step 2: Configure the Modem Script

    The camera uses a script to load the necessary drivers for the modem. We need to edit this script to ensure it recognizes our specific EC20 variant.

    1. Open the modem configuration file for editing. We’ll use vi in this example:bashvi /etc/wireless/modem
    2. Add or modify the section for the ec20-ssc338q device. Your file should contain the following block. Pay close attention to the vendor and product IDs to ensure they match your lsusb output.bash# SSC338Q with Quectel EC20 and usb0 if [ “$1” = “ec20-ssc338q” ]; then modprobe usbserial vendor=0x2c7c product=0x0125 modprobe rndis_host sleep 10 exit 0 fi
    3. Save and exit the file.
      • In vi, press ESC, then type :wq and press Enter.

    Step 3: Apply the Configuration and Reboot

    Now, we tell the system to use our new ec20-ssc338q configuration and reboot.

    1. Set the boot environment variable:bashfw_setenv wlandev ec20-ssc338q
    2. Reboot the camera for the changes to take effect:bashreboot

    ⚠️ Important Note: After rebooting, the camera’s USB interface (usb0) will be assigned a static IP address: 192.168.2.10. To maintain SSH access during this phase:

    • You must set your computer’s Ethernet IP address to 192.168.2.1 (subnet 255.255.255.0).
    • Connect directly to the camera’s USB port or via a router configured for the 192.168.2.x subnet.

    Step 4: Final Verification and VPN Connection

    1. After the reboot and reconnection (via the 192.168.2.10 IP), SSH back into the camera.
    2. Run ifconfig. You should now see a new network interface (likely usb0 or wwan0) that has obtained a public IP address from your cellular ISP. This means the EC20 module is working correctly!
    3. Connect via VPN: Since you pre-configured your VPN, simply activate the VPN connection on your laptop. You should now be able to SSH directly to the camera’s VPN IP address from anywhere with an internet connection, no longer needing the 192.168.2.10 workaround.

    Troubleshooting and Reverting

    • Something went wrong? If the configuration fails and you lose access, you may need a serial console connection to revert. If you can still access the camera, you can clear the wlandev setting:bashfw_setenv wlandev rebootThis will tell the camera to bypass the EC20 setup on the next boot.
    • No Internet on EC20? Check your APN settings. You may need to use udhcpc or additional scripts to handle the DHCP client process on the usb0 interface.

    By following these steps and planning with a VPN, you’ve created a robust, remotely accessible cellular camera. Happy monitoring!

  • A complain about FPV

    Looking back, the FPV hobby has been through so many ups and downs. Yeah, I feel like ranting a bit…When COVID hit in 2020, along with shifting international relations, we saw an STM32 chip shortage. Experts claimed it was just a simple supply-and-demand issue. But years later, we can see that AT32 chips have taken over a significant portion of STM32’s market share. Many ESCs and other microcontroller applications are now dominated by AT32 – not entirely, but substantially. Don’t get me wrong, this outcome isn’t necessarily bad. I’m just saying the chip shortage period was a really unsettling experience for FPV.Then there’s the MPU6000 gyro being discontinued – we never got a perfect replacement. Even though Betaflight and Fettec have made big improvements in ICM gyro support, it’s still a huge loss for high-performance freestyle quads. Nobody cares about FPV; our market is just too small.The war led to BLHeli32 shutting down development – another massive blow to FPV. Manufacturers had to switch to AM32. I know BLHeli32 isn’t completely gone, but development has stopped. And I’ll say it outright: AM32 ESCs with ICM gyros are a disaster. Thankfully, if you want top-tier ESC performance, Fettec is an option – expensive, but performance-wise it definitely holds up against BLHeli32. I’m talking about freestyle here; for racing you’ll need to test it yourself. Of course, ICM gyros on Fettec flight controllers perform the same as on Betaflight – still not matching the MPU6000.There are rumors that Rapidfire’s new version under Orca isn’t as good as the original. I haven’t verified this myself – hopefully it’s not true.That’s all I can think of for now. Really hope the FPV hobby gets the attention and protection it deserves.

    回首过去,FPV运动经历了太多的坎坷。是的,我又想逼逼了。。2020年随着covid的开始,以及国际关系发生的变化,stm32出现了芯片短缺潮。专业人士认为这仅是供小于求的原因造成的。多年后的今天我们发现亚特力已经替代了stm32相当一部分的市场,很多电调包括其它用途的单片机都已经是亚特力的天下了,尽管这不是绝对的情况。当然这个结果并没有什么不好,我只是想说FPV经历的芯片短缺潮这段时期是一个令人不安的经历。姿态传感器,MPU6000停产,我们没能有完美的替代品。尽管最新的Betaflight和Fettec 都对icm的支持有了较大的进步,但是对于高性能的穿越机来说还是一个巨大的遗憾。没有人关心FPV,它的市场太小了。战争,BLHeli32关闭了项目,这是另外一个巨大的冲击对于FPV来说。厂商们不得不转向AM32,我知道bl32并没有完全消失,但它已经停止了开发。我可以大言不惭地说am32电调搭配ICM传感器是一个灾难。幸运的是,如果你想要最高性能的电调,可以考虑fettec,虽然它很贵,但是性能绝对不在bl32之下。我说的是花飞应用,能否满足竞速的需求需要自己测试。当然,icm传感器在Fettec飞控上的情况和betaflight 一样,不会超过MPU6000的性能。Rapidfire 被Orca收购后推出的新版接收机据说,没有之前的性能强劲,这个情况我没有亲自验证,但愿不是真的。暂时想起来这么多,希望FPV运动可以得到重视和保护。

  • Protected: FPV over Celluar

    This content is password protected. To view it please enter your password below:

  • 在Radxa Zero 3上运行deepseek

    在Zero上编译非常痛苦,所以使用交叉编译:

    安装步骤
    更新包列表:

    sudo apt update
    安装交叉编译工具链:

    sudo apt install gcc-aarch64-linux-gnu g++-aarch64-linux-gnu
    //gcc-aarch64-linux-gnu:ARM64架构的C编译器。

    //g++-aarch64-linux-gnu:ARM64架构的C++编译器。

    验证安装:

    aarch64-linux-gnu-gcc –version
    aarch64-linux-gnu-g++ –version

    1. 设置交叉编译环境
      在项目目录中创建一个 toolchain.cmake 文件,用于指定交叉编译工具链。

    创建 toolchain.cmake 文件
    cmake

    toolchain.cmake

    set(CMAKE_SYSTEM_NAME Linux)
    set(CMAKE_SYSTEM_PROCESSOR aarch64)

    set(CMAKE_C_COMPILER /usr/bin/aarch64-linux-gnu-gcc)
    set(CMAKE_CXX_COMPILER /usr/bin/aarch64-linux-gnu-g++)

    set(CMAKE_FIND_ROOT_PATH /usr/aarch64-linux-gnu)
    set(CMAKE_FIND_ROOT_PATH_MODE_PROGRAM NEVER)
    set(CMAKE_FIND_ROOT_PATH_MODE_LIBRARY ONLY)
    set(CMAKE_FIND_ROOT_PATH_MODE_INCLUDE ONLY)

    1. 交叉编译项目
      使用交叉编译工具链编译项目。

    步骤 1:生成构建文件

    cmake -B build -DCMAKE_TOOLCHAIN_FILE=toolchain.cmake
    步骤 2:编译项目

    cmake –build build –config Release -j 2
    步骤 3:验证编译结果
    检查生成的可执行文件是否为ARM64架构:

    file build/my_program
    输出示例:

    build/my_program: ELF 64-bit LSB executable, ARM aarch64, version 1 (SYSV), dynamically linked, interpreter /lib/ld-linux-aarch64.so.1, for GNU/Linux 3.7.0, not stripped

    1. 将程序复制到RK3566
      使用 scp 或U盘将编译好的程序复制到RK3566上运行。

    使用 scp 复制

    scp build/my_program user@rk3566_ip:/path/to/destination
    在RK3566上运行

    ./llama-server -m DeepSeek-R1-Distill-Qwen-1.5B-Q4_K_M.gguf –host 0.0.0.0

    使用精简蒸馏模型DeepSeek-R1-Distill-Qwen-1.5B-Q4_K_M.gguf

    结果还是非常意料之内的,缓慢无比。0.2 t/s

  • Radxa 3w zero connect wifi before login

    So here is the thing:
    I want to use one of my radxa 3w zero to be a light server, but for some reason their CLI version can not start up, which is insane. And I tried, it just stuck at the beginning.

    So I uninstalled the xfce of debian-xfce version. And everything I need were working properly.
    Except the Wi-Fi. It only connects when I login.

    I have tried several methods. And finally.

    At /etc/NetworkManager/system-connections/mywifi.nmconnection

    Then disable the line “permissions” and it works.